

Email Notifications
Manage application emails in NetWise
NetWise lets you customize the emails used in your wholesale application workflow. From the Applications section, you can edit the emails sent when an application is approved or rejected, and preview the internal email your team receives for new submissions.
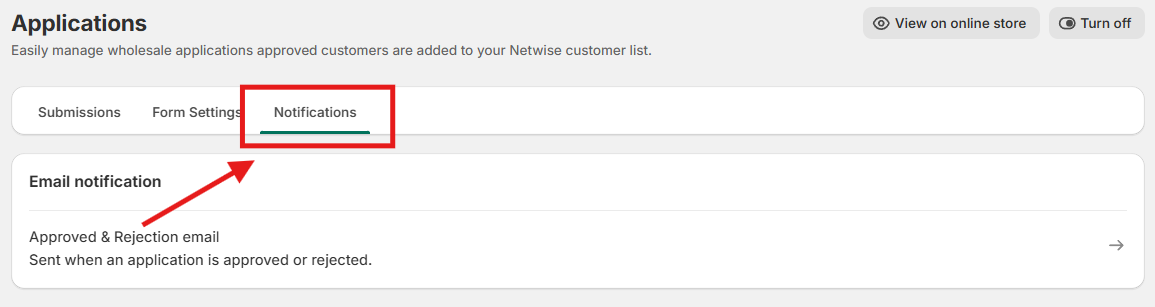
What emails are available
- Approval notification — sent to the applicant after you approve their application.
- Rejection notification — sent to the applicant after you reject their application.
- Merchant Notification — shown in preview so you can review the internal email layout for new application alerts.
The customer-facing emails use the email address entered in the application form under Primary contact.
Open Email notification settings
When the Email notification settings window opens, you can switch between the available templates and preview each one before saving.
Edit the approval email
Use the Approval notification tab when you want to change the email a customer receives after approval.
In Edit approval notification, NetWise shows the variables available for that email:
store_name— store name to display in the emaillogin_link— login link to display in the email
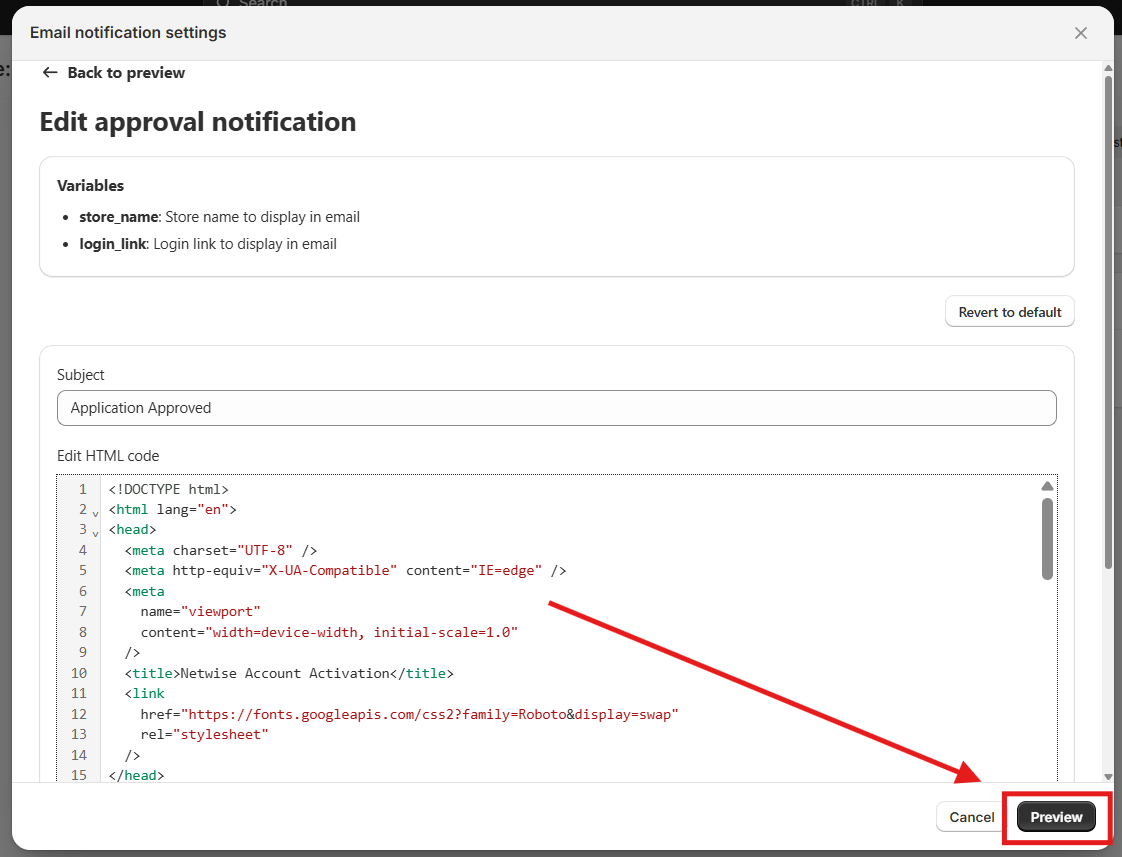
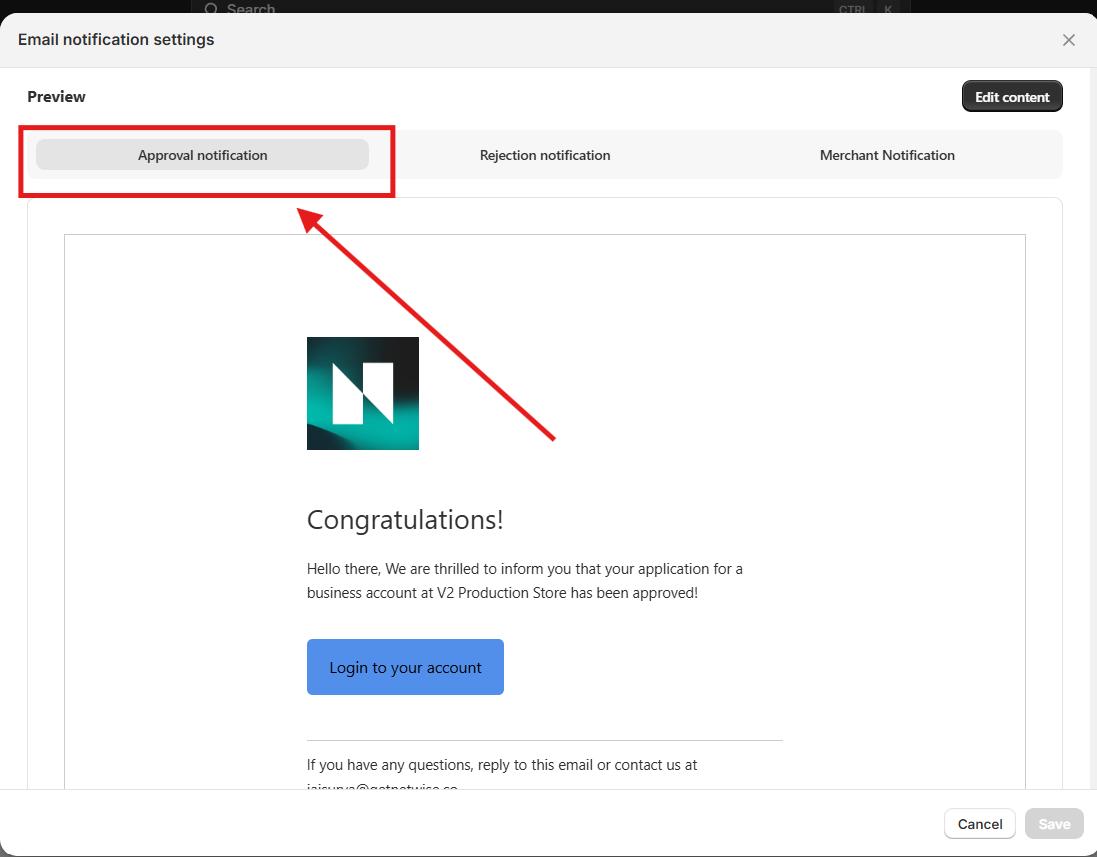
login_link in your approval email so approved customers can sign in and start shopping with their wholesale access immediately.When to use Revert to default
If you want to remove your custom edits and go back to NetWise's default message, click Revert to default in the editor.
Edit the rejection email
Use the Rejection notification tab to customize the message sent when an application is declined.
In Edit rejection notification, NetWise provides these variables:
store_name— store name to display in the emailreason— reason for rejection
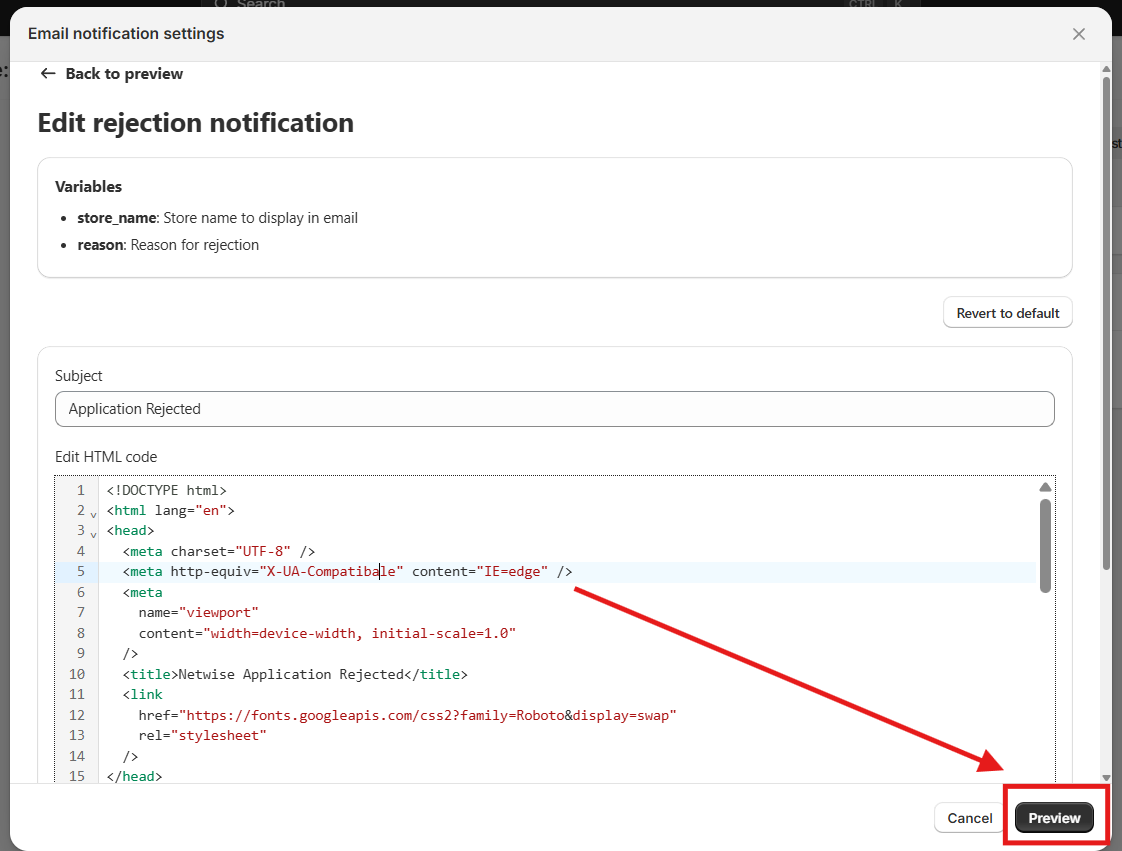
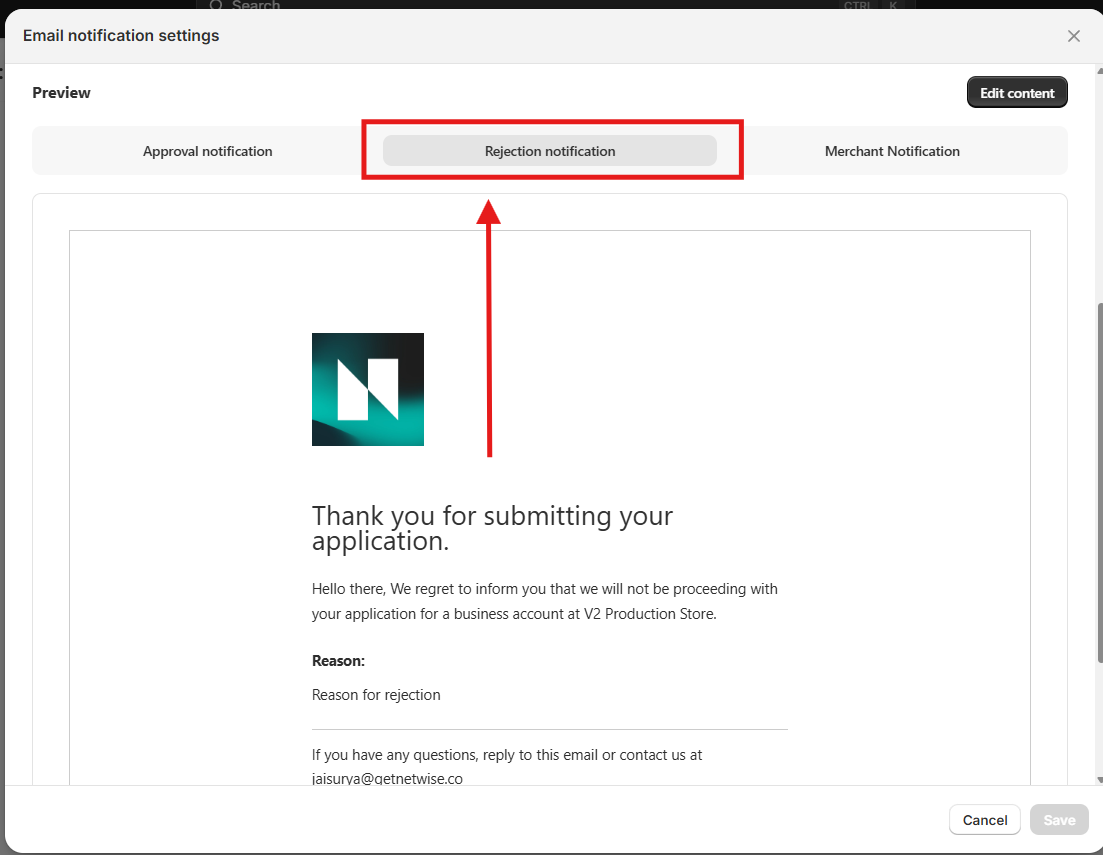
reason variable is best used for a concise review outcome, not a long policy note.Review the merchant email
The Merchant Notification tab lets you preview the internal email used for new wholesale applications. This is helpful if your team wants to confirm the message layout and the call-to-action button, such as View Application.
In the preview, the email is addressed to your store team and includes a direct application review prompt.
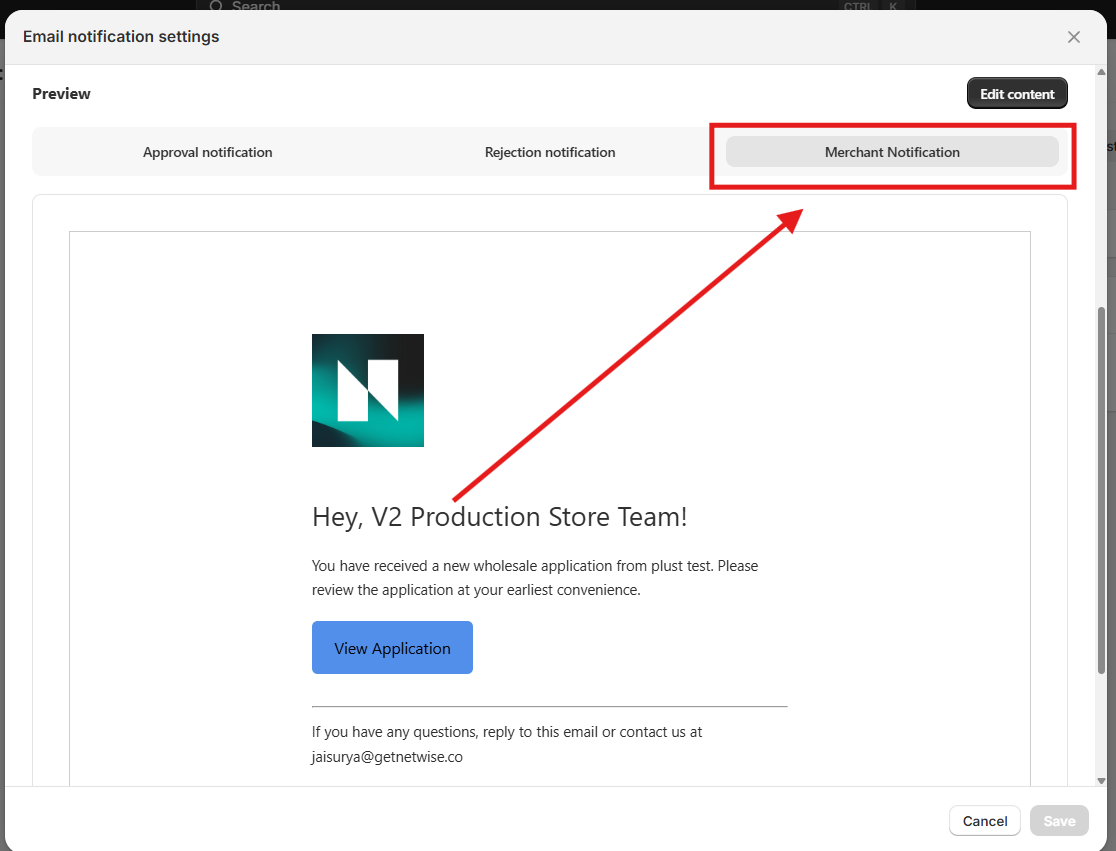
Preview before you save
Each template can be tested in the built-in preview screen before you save it.
- Use Preview in the editor to render the current HTML.
- Use Back to preview to return from the code editor.
- Switch between Approval notification, Rejection notification, and Merchant Notification tabs to compare templates.
- Click Cancel if you do not want to keep your changes.
Use a branded sender email
If you want these emails to come from your own domain instead of a generic sender, set up domain verification in NetWise.
After verification, your email will show a Verified badge and NetWise will send branded emails using that domain.
See Email domain verification for the full setup steps.
How these emails fit into the application workflow
Email notifications are part of the larger Applications workflow in NetWise:
- Customers submit the storefront form.
- New requests appear in Submissions with statuses like Pending, In Review, and Rejected.
- When you approve an application, you must choose a Customer Group.
- When you approve or reject the application, the matching email template is used.