

Application Submissions
How Customers Submit an Application
What Happens After Submission
Understanding Application Status (Pending, Approved, Rejected)
Approving an Application
Rejecting an Application
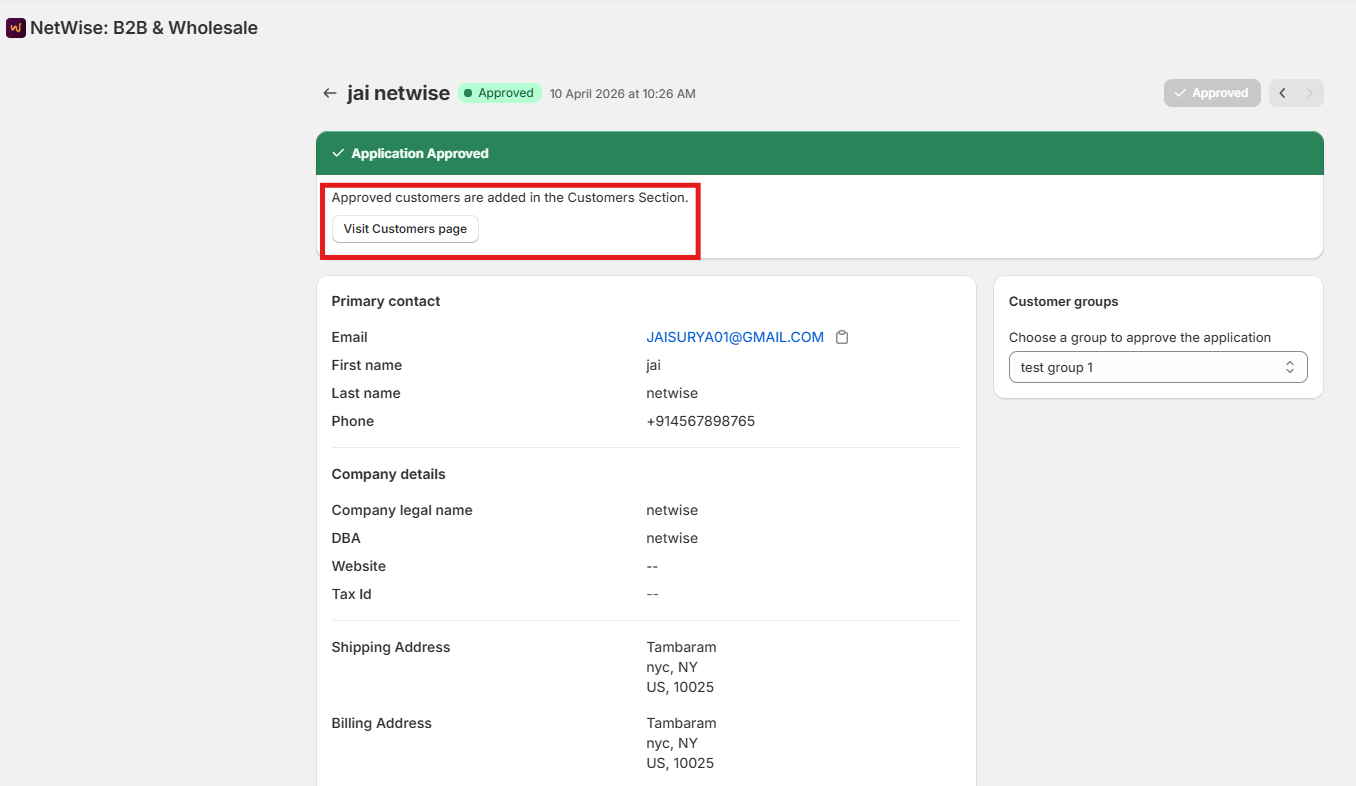
What Happens After Approval
How Customers Submit an Application
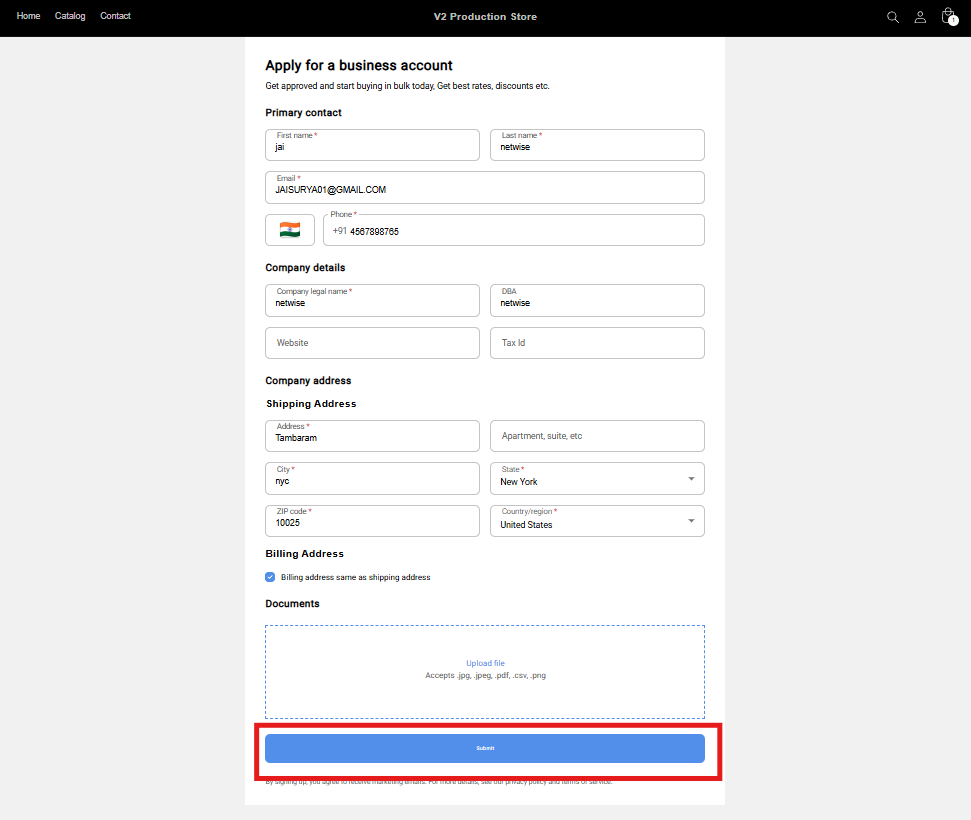
Customers apply for B2B access by filling out the application form on your storefront.
Key points:
The form is accessible on a dedicated page on your Shopify store.
Customers fill in their business and contact details, then hit Submit.
No existing Shopify account is required to submit an application.
You can share the form link directly with potential buyers or add it to your store navigation.
What Happens After Submission
The moment a customer submits the application form, it is captured in Netwise and queued for your review.
Key points:
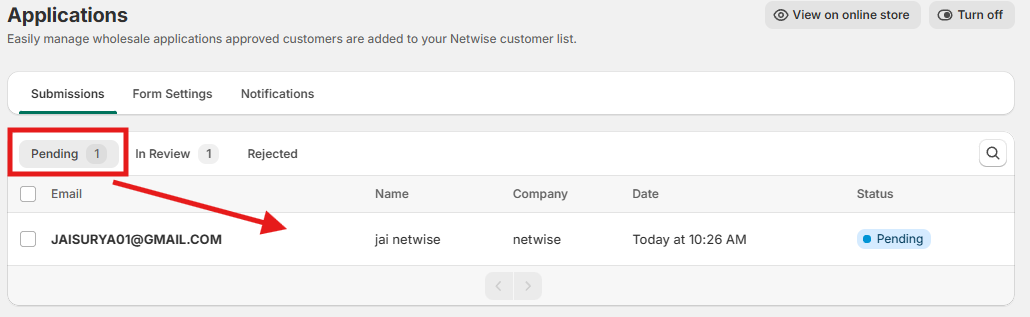
The application is instantly created in Netwise with a Pending status.
No customer account is created yet — that only happens after approval.
You can view all pending applications from the Applications section in your Netwise dashboard.
The customer's submitted details (name, business info, etc.) are stored and visible when you open the application.
Understanding Application Status (Pending, Approved, Rejected)
Every application in Netwise has a status that tells you exactly where it is in the review process.
Status | What it means |
|---|---|
Pending | Submitted by the customer. Waiting for your review. |
Approved | You approved it. Customer has been added to Netwise. |
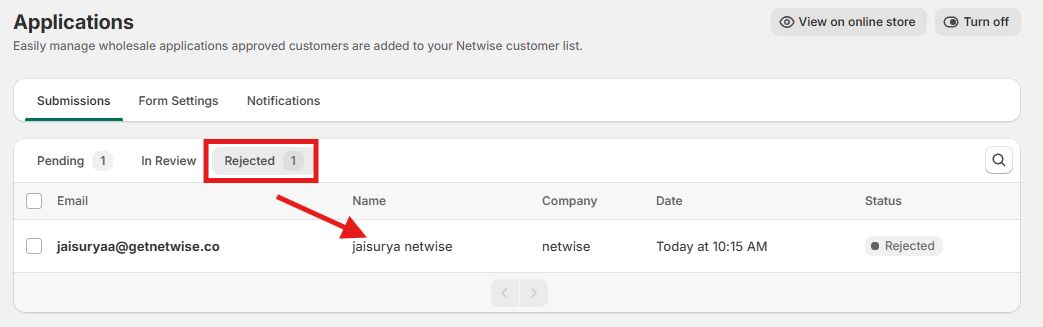
Rejected | You declined it. Customer was not added. |
Pending Applications:
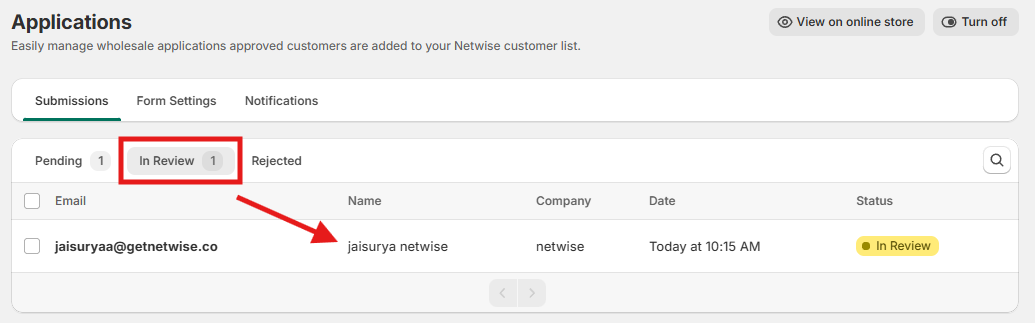
In Review Applications:
Rejected Applications:
Key Points :
All new applications automatically start as Pending.
You can filter your applications list by status to stay organized.
Status updates immediately when you take an action — no delay.
Approving an Application
Approving an application creates the customer in Netwise and gives them access to B2B pricing.
Key points:
Open the application from your Applications list in Netwise.
Review the customer's submitted details.
Click Approve.
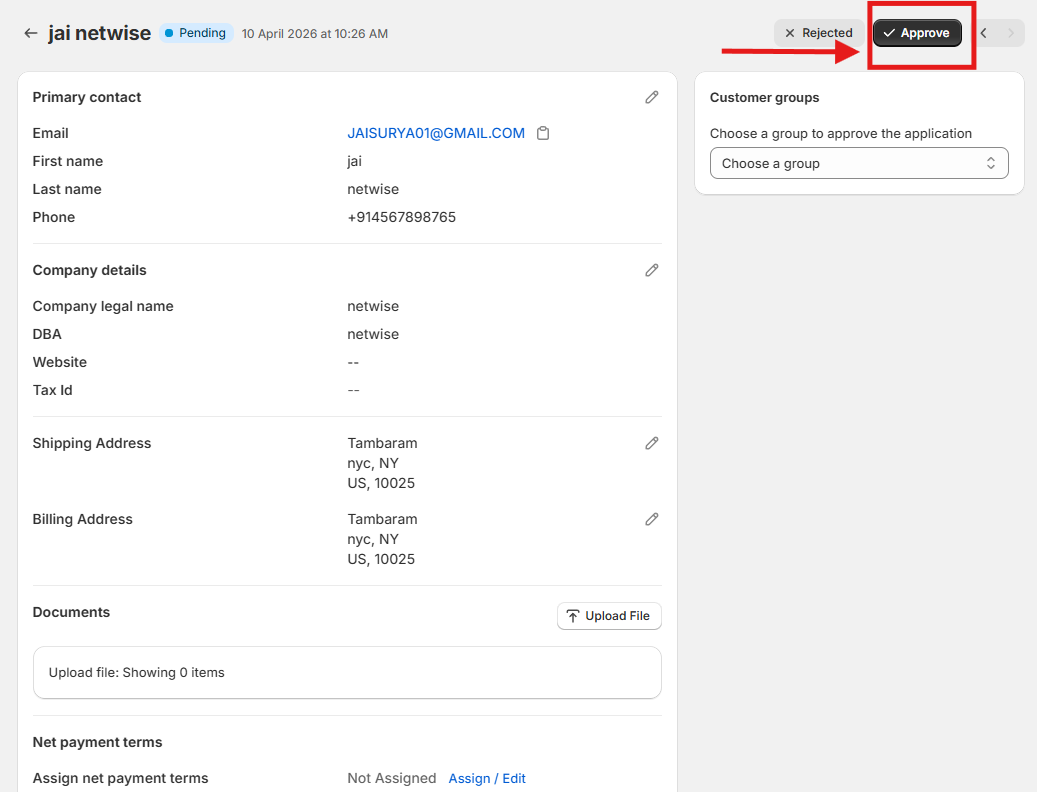
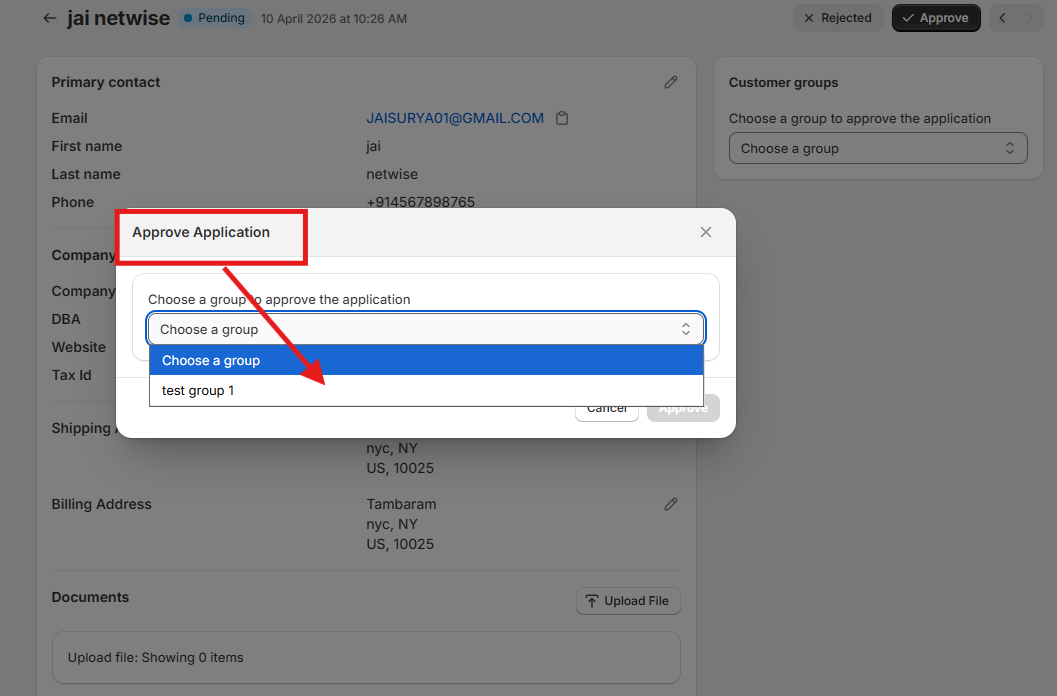
Select the Customer Group to assign this customer to.
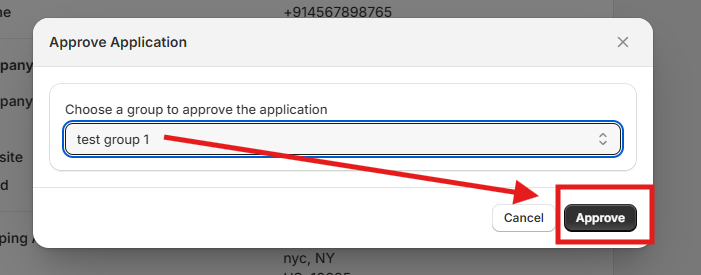
Confirm — the customer is now created and added to Netwise.
The application status changes to Approved.
Important:
Selecting a Customer Group is required to complete approval — you cannot skip this step.
The group you assign controls what catalog and pricing the customer sees.
Rejecting an Application
If a customer doesn't meet your B2B criteria, you can decline their application.
Key points:
Open the application from your Applications list.
Click Reject.
The application status changes to Rejected.
The customer is not created in Netwise and receives no B2B access.
Rejection is final — the customer would need to resubmit a new application if applicable.
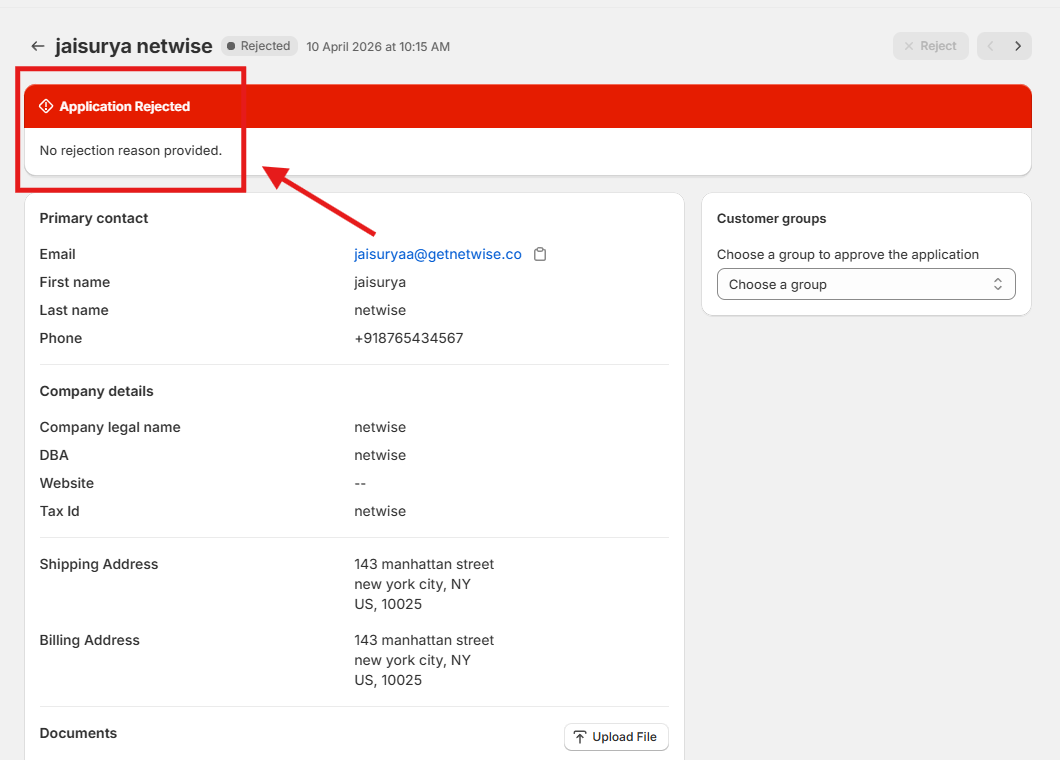
Note: Rejected customers do not receive an automatic notification unless you have configured a rejection email in the Notifications settings.
What Happens After Approval
Once you approve an application, the customer is fully set up and ready to shop at B2B prices.
Key points:
A customer account is created in Netwise.
The customer is added to the Customer Group you selected.
Their pricing, catalog access, and order rules are all determined by that group.
The customer can log in to your store and immediately see their B2B prices.
No further setup is needed on your end.
In short:
Approved → Group Assigned → Customer Active → B2B Pricing Live.